

How to Inspect a Used Car
Before You Buy: A Buyer's Guide
Purchasing a pre-owned vehicle is a significant investment, and a thorough inspection is your best tool for making a wise choice. Knowing how to inspect a used car before you buy can save you from unexpected repairs and give you confidence in your decision. This guide is designed to empower you, transforming you from a hopeful shopper into an informed buyer. By walking through the essential checkpoints—from the exterior paint to the engine's hum—you can identify potential issues and verify the quality of your potential new ride. A few minutes spent on a careful evaluation can lead to years of reliable transportation. Whether you are a first-time buyer or have been through the process before, this checklist will help you focus on what truly matters. Explore our used inventory with the assurance that you have the knowledge to pick a winner.
Navigating the world of used cars does not have to be intimidating. By following a structured inspection process, you can systematically review a vehicle’s condition and build a clear picture of its history and health. This step-by-step approach ensures you do not overlook critical areas. Remember, the goal is to find a vehicle that not only fits your budget but also meets your standards for safety and reliability. A detailed inspection is the bridge between finding a car you like and driving home in a car you trust.
Your Comprehensive Used Car Inspection Checklist
When you step onto a lot, every vehicle represents a possibility. But behind the shine, each car has a unique story. Your job is to uncover that story. This comprehensive checklist will guide you through a detailed inspection, helping you assess a vehicle's mechanical, cosmetic, and electronic condition. Think of yourself as a detective looking for clues. While our team carefully inspects every vehicle we offer, performing your own review is a crucial part of the car-buying journey. It helps you connect with your potential vehicle and provides invaluable peace of mind before you move forward with the financing process.
Phase 1: The Exterior Walk-Around
Your inspection begins before you even open the door. A slow, methodical walk around the car in good daylight can reveal a lot about its past. Kneel down to look along the body panels from different angles to spot imperfections you might otherwise miss.
- Body and Paint: Look for inconsistencies in the paint finish, which can signal previous bodywork. Check for areas of rust, especially under the doors, around the wheel wells, and on the frame. Ensure all body panels line up evenly; large or uneven gaps could indicate a past accident.
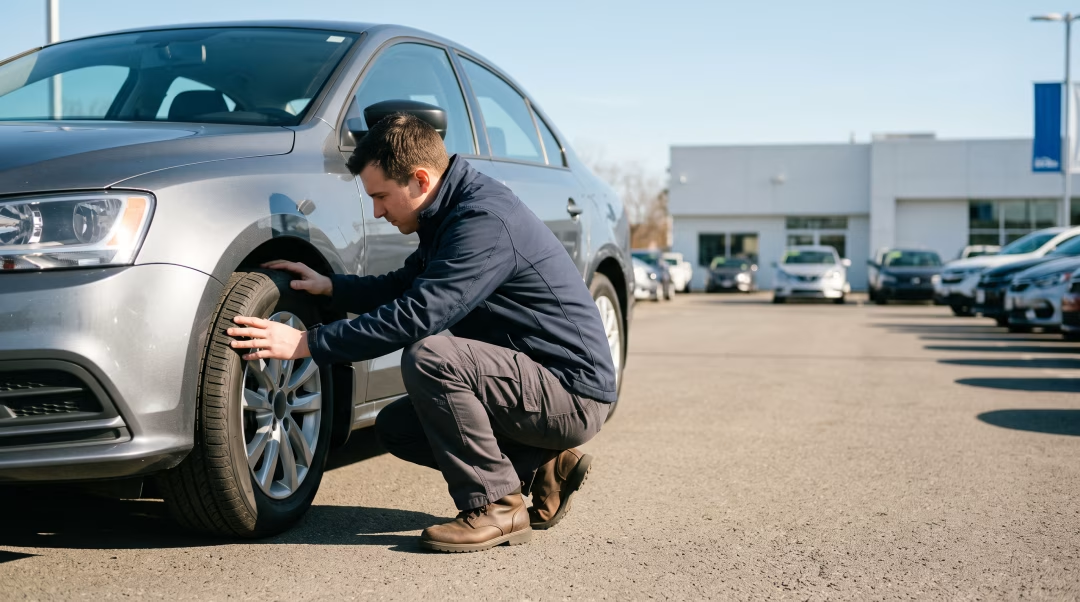
- Tires: The tires are a key indicator of a car’s maintenance history and alignment. Check the tread depth on all four tires—they should be worn evenly. Uneven wear could point to alignment or suspension problems. Also, check for cracks or bubbles on the sidewalls.
- Glass and Lights: Carefully inspect the windshield and all windows for any chips or cracks. Even a small chip can spread over time. Turn on all exterior lights—headlights (high and low beams), taillights, brake lights, and turn signals—to ensure they are all working correctly and the lenses are clear, not foggy or cracked.
Phase 2: Under the Hood
You do not need to be a certified mechanic to perform a basic under-the-hood check. With the engine off and cool, pop the hood and look for any immediate red flags. A clean engine bay is a good sign, but an engine that has been recently detailed could also be hiding leaks, so look closely.
- Fluids: Check the engine oil dipstick. The oil should be a light brown color; if it is black, gritty, or milky, it could indicate serious engine issues. Check the transmission fluid (if possible), which should be pink or red and not smell burnt. Coolant levels in the reservoir should be adequate.
- Belts and Hoses: Visually inspect the rubber belts and hoses. Look for any visible cracks, fraying, or soft spots. These components are critical for the engine's operation and can be costly to replace.
- Battery: Look at the battery terminals for any signs of fuzzy blue or white corrosion, which could indicate a weak connection or an old battery.
Phase 3: The Interior Inspection
The inside of the car is where you will be spending your time, so make sure it is comfortable, clean, and fully functional. The interior’s condition can also reflect how well the previous owner cared for the vehicle overall.
- Seats and Upholstery: Check all seats for tears, stains, or excessive wear. Sit in every seat, including the back, to check for comfort and support.
- Electronics and Controls: This is a critical step. Systematically test every button, switch, and knob. This includes the air conditioning and heater, radio, infotainment system, power windows and locks, sunroof, and any other electronic features.
- Smell Test: A vehicle’s smell can tell you a lot. Sniff for musty or mildew odors that might suggest a water leak. Heavy air fresheners could be masking tobacco smoke or other unpleasant smells.
- Check the Trunk: Lift the carpet in the trunk to look for signs of rust or water damage. Check to see if the spare tire and necessary tools like a jack and lug wrench are present.
Phase 4: The All-Important Test Drive
The test drive is your chance to see how the car feels and performs on the road. It is arguably the most important part of your inspection. Before you head out, make sure you schedule a test drive so the vehicle is ready for you. Plan a route that includes a mix of driving conditions—slow neighborhood streets, stop-and-go traffic, and a stretch of highway to get it up to speed.
Turn the radio off and listen carefully to the vehicle. Pay attention to how the engine sounds when you start it and as you accelerate. Listen for any unusual noises, like squealing from the brakes, clunking from the suspension when you go over bumps, or humming that changes with your speed. Feel for any vibrations in the steering wheel or pedals. The transmission should shift smoothly without any jerking or hesitation. Test the brakes in a safe area to ensure they are responsive and do not pull the car to one side.
Phase 5: Paperwork and Professional Opinion
After your personal inspection and test drive, the final steps involve reviewing the vehicle's history and considering a professional opinion. Ask for the vehicle history report (like a CarFax or AutoCheck). This document provides valuable insight into the car's past, including accident history, title status (check for salvage or rebuilt titles), and previous owners. If everything checks out and you are serious about the vehicle, we highly recommend a pre-purchase inspection (PPI) by a qualified, independent mechanic. For a reasonable fee, a professional technician can put the car on a lift and spot potential issues you might have missed, providing an expert assessment of its overall condition. Asking the right questions and getting a professional opinion can be the final piece of the puzzle.
What is the single most important thing to check on a used car?
While a holistic inspection is vital, paying close attention to the engine and transmission is critical. Listen for unusual noises, check for fluid leaks, and ensure the transmission shifts smoothly during the test drive. These are the most complex and costly components to repair, so their health is paramount to the vehicle's long-term reliability.
Can I properly inspect a car if I am not a mechanic?
Absolutely. This guide is designed for non-mechanics to spot common red flags and assess the overall condition of a vehicle. Your own visual inspection and test drive can rule out many problematic cars. However, for a final confirmation, we always recommend a pre-purchase inspection by a trusted mechanic to catch issues that require a professional eye.
What is a vehicle history report?
A vehicle history report, from a service like CarFax or AutoCheck, is a detailed summary of a car's past based on its Vehicle Identification Number (VIN). It includes information about reported accidents, title history (such as salvage or flood damage titles), odometer readings, number of previous owners, and sometimes service records.
How long should my test drive be?
A good test drive should last at least 20 to 30 minutes. It is important to drive the car in various conditions you would encounter daily, including city streets, stop-and-go traffic, and highway speeds. This allows you enough time to evaluate the engine, transmission, brakes, and suspension performance in different scenarios.
What should I do if I find a minor issue during my inspection?
Finding a minor issue, such as worn tires or a non-critical electronic feature that is not working, does not have to be a deal-breaker. You can use this information as a potential point for negotiation on the vehicle's price. Alternatively, you can get an estimate for the repair cost to decide if it is an expense you are willing to take on after the purchase.
